Publishing Your First Map
In this guide we will publish a simple map of green spaces in and around Sheffield.
The data
First-off, let’s load the data we wish to publish into QGIS (GreenspaceSite_Sheffield.shp). This is subset of the OS Open Greenspace dataset.
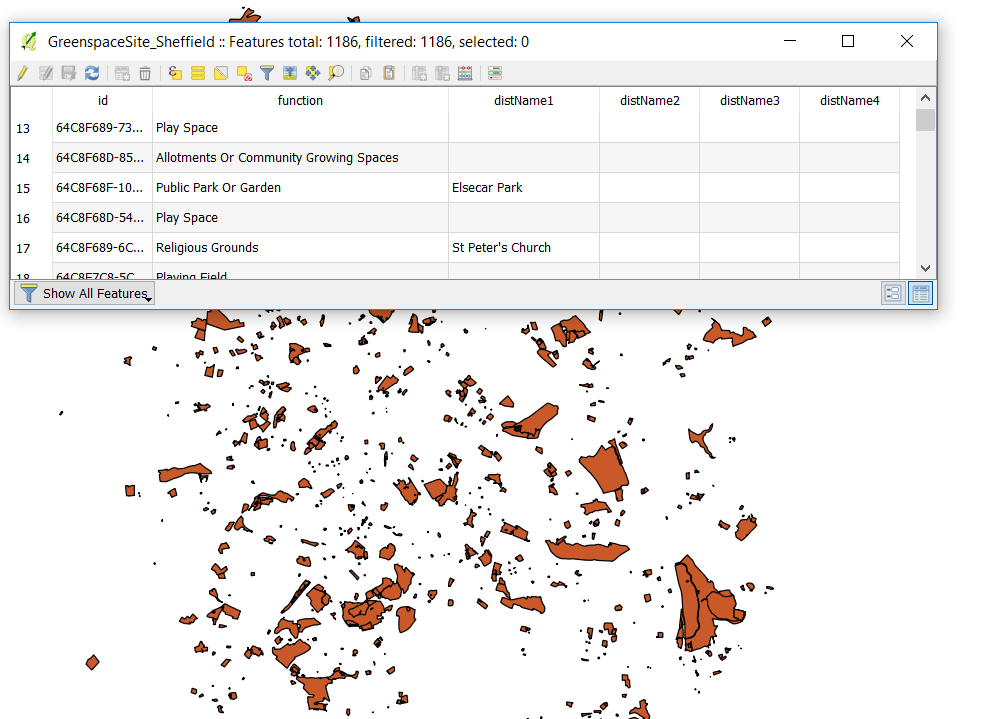
As you can see from the screenshot above, it’s a polygon dataset of green spaces, with columns of interest such as function and distName1.
Background maps
So far we’ve loaded foreground data in QGIS, let’s now add some background maps.
Mappin includes a tile-based WMTS layer called OSZoomStack which we can load into our project for contextual mapping. This is Ordnance Survey Zoomstack data with the Outdoor style applied.
We’ll now add this background map using the WMTS connection we configured in the previous guide.
- In QGIS, select Layer > Add Layer > Add WMS/WMTS Layer
- Select Mappin WMTS and click Connect
You should be presented with a list of WMTS layers:
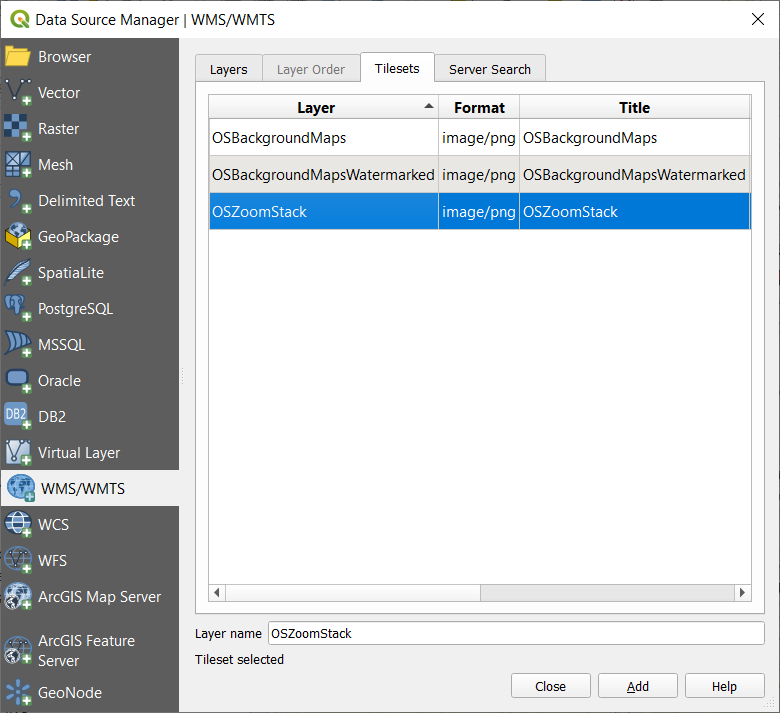
- Select OSZoomStack, click Add, then click Close
- Now adjust your layer ordering in QGIS so the background maps are at the bottom of the layer stack.
You should now see something similar to this:
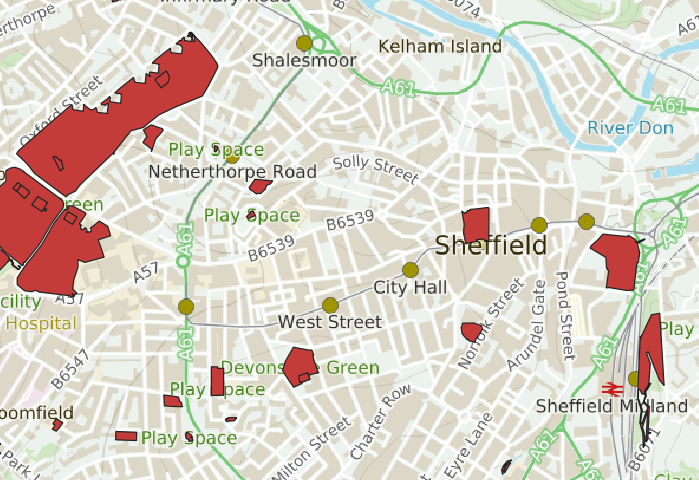
Please note: Your background mapping may look grainy / pixelated or poor quality. The background mapping has been configured to perform well and look good at specific predefined map scales. Although the background images may not look good in QGIS, they will look great on Mappin after your project is uploaded so don’t worry.
Uploading data to Mappin
Right now we have two layers in QGIS:
- Background mapping (which has come from Mappin so Mappin is aware / has access to it); and
- A foreground layer, currently a local Shapefile
We need to now upload this Shapefile to Mappin so it has access to it for publishing.
- Select Database > DB Manager...
- Expand PostGIS and select Mappin
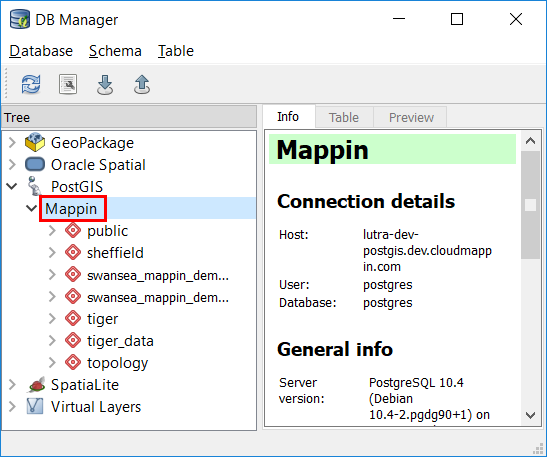
- Select Schema > Create schema
- Enter sheffield (lower-case) as its name and click OK
- Select the sheffield schema and click Import Layer/File...
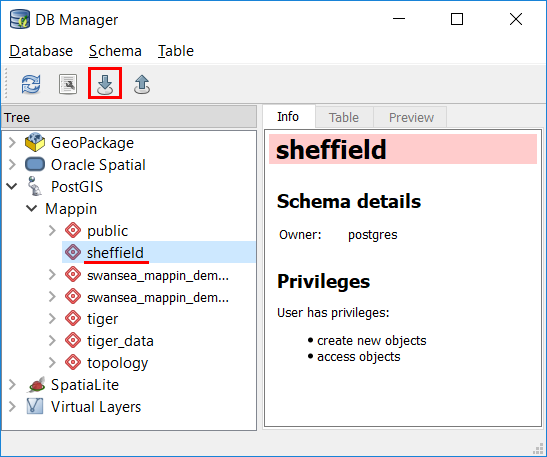
So far we have created a new schema called sheffield and we’re about to import our green spaces layer into it.
- Ensure GreenspaceSite_Sheffield is selected for Input
- Click Update options
- Enable the Create spatial index option
- Click OK
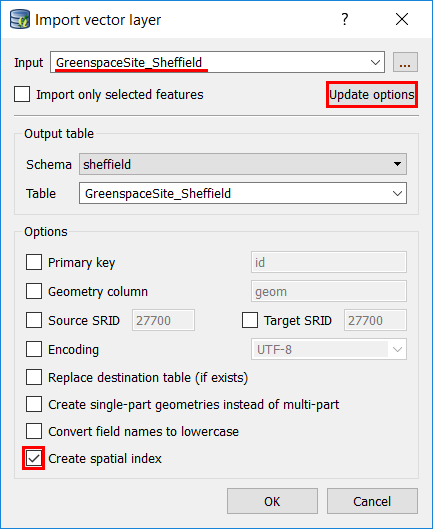
After a few moments (be patient) the layer should be loaded in Mappin’s PostGIS database.
Next we’ll remove the Shapefile version of the layer from our project and instead add the PostGIS version:
- Remove the layer GreenspaceSite_Sheffield from the project
- Refresh the Browser Panel and locate PostGIS > Mappin > sheffield > GreenspaceSite_Sheffield
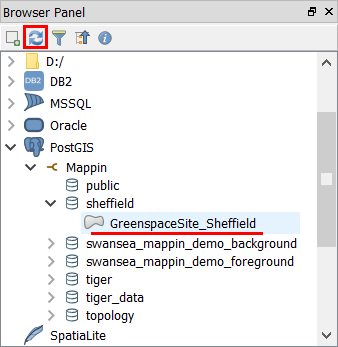
- Double-click the layer to load it into the project (make sure it is above the background map)
At this point, all layers in our project are known to Mappin. We can now tweak the QGIS project and then upload it to Mappin for publishing our first map!
Publishing to Mappin
Mappin is able to extract many of QGIS’ project settings so we can configure things like layer aliases (names), layer order and default map extent within QGIS. We can even use it to style layers - more on that layer.
Let’s set some basic settings now:
- Ensure the background map is at the bottom of the layer stack
- Create a layer alias (human-readable name) for each layer by:
- Opening layer properties
- Entering a value for the Title field in the QGIS Server tab
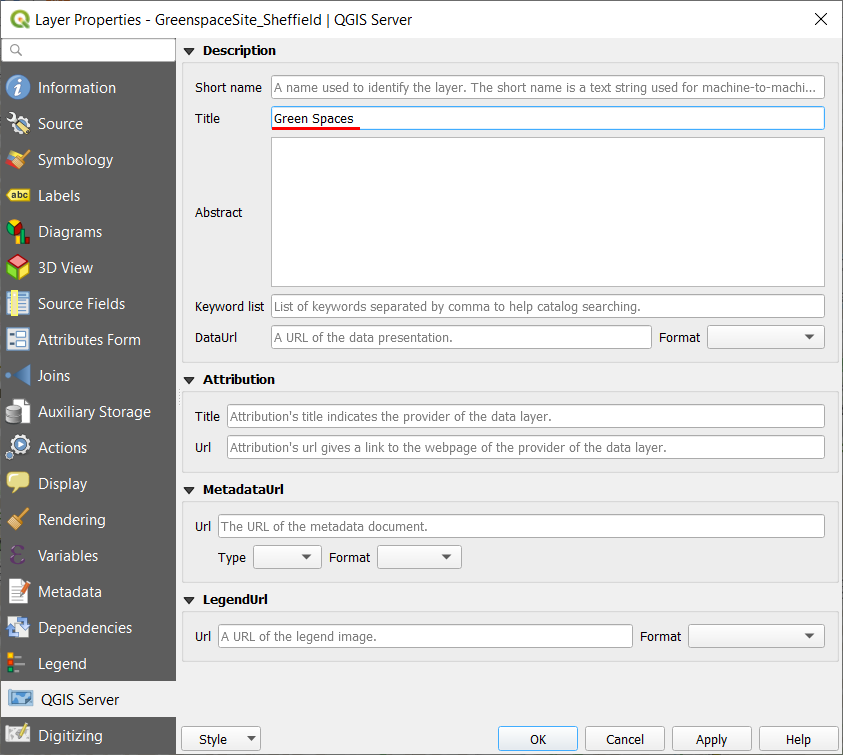
In this example I used Green Spaces and Background Map
That’s the layer names and order - next let’s set the default published map extent
- Right-click on the foreground layer and select Zoom to Layer
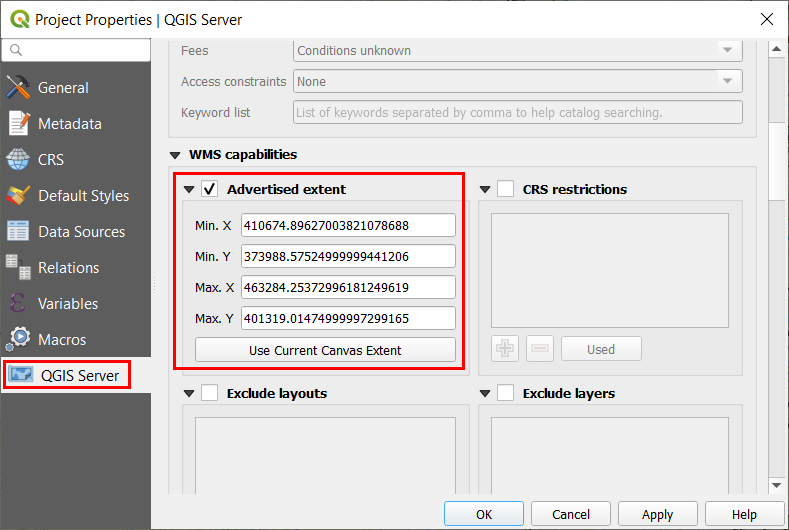
- Select Project > Properties
- On the QGIS Server tab, enable Advertised extent
- Click Use Current Canvas Extent and click OK
These settings will soon be loaded in Mappin for our default published map extent.
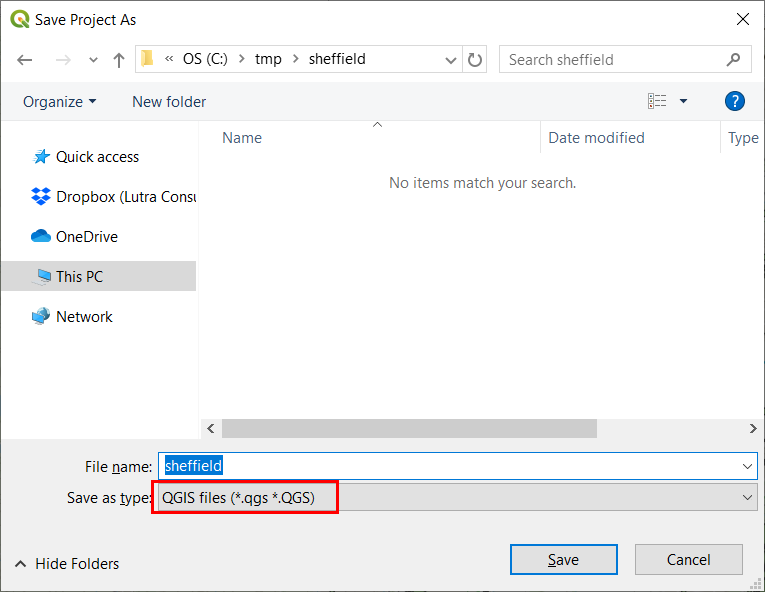
- Now Save the QGIS project as an uncompressed (.qgs) project:
Uploading the QGIS Project and Configuring Mappin
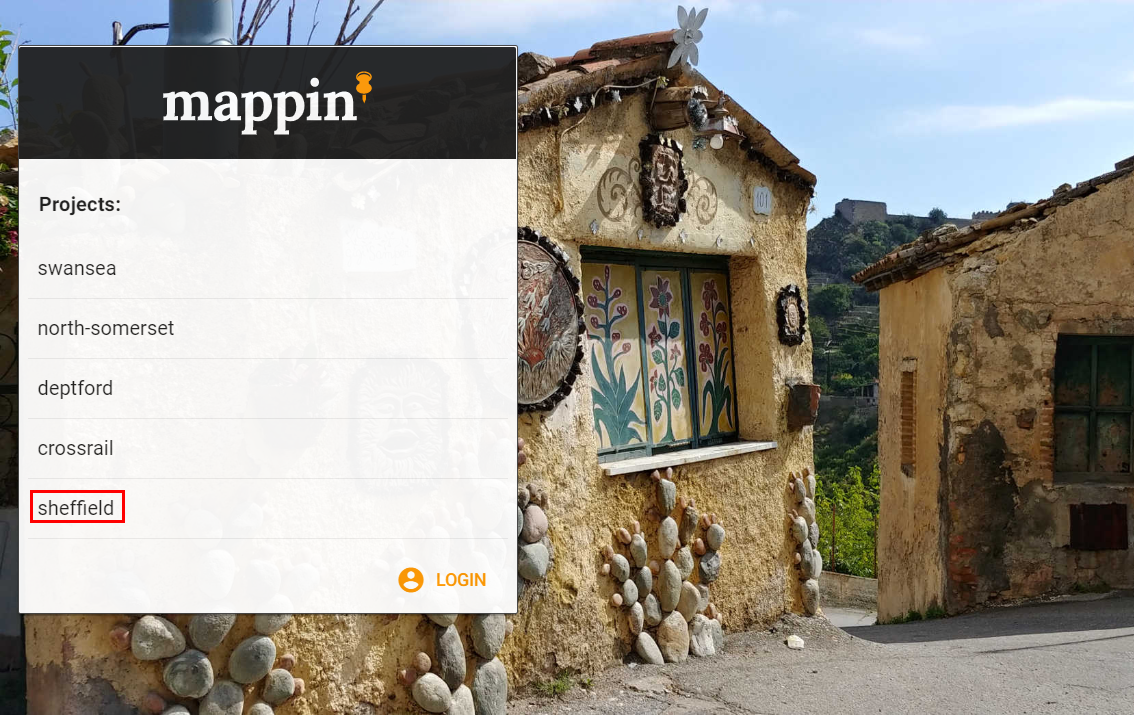
Your Mappin instance should already have an empty public project called sheffield - we will now upload our QGIS project file to this Mappin project.
- Navigate to
https://YOU-admin.cloudmappin.comwhere YOU is your Mappin account name.
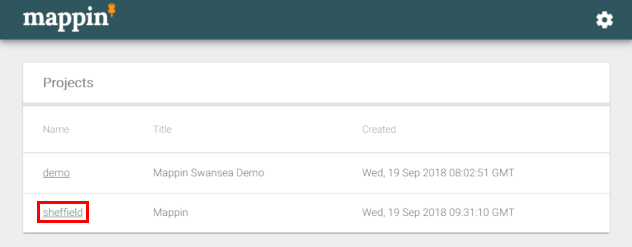
Here you’ll see a list of your projects.
- Select the sheffield project.
Project settings for this specific project are then shown.
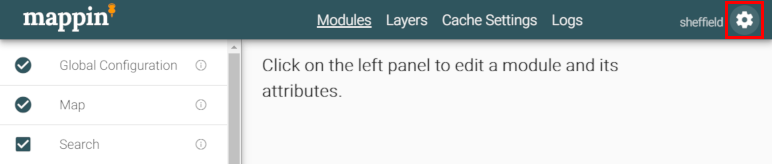
- Click the cog icon in the top-right of the screen.
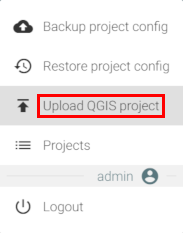
- Select Upload QGIS project and upload the QGIS project we saved in the last section.
Now we’ve uploaded our QGIS project file to Mappin we just need to make a few configuration changes (for example to tell Mappin which project layers to display) and we should have a working map.
The first thing we’ll do is tell Mappin which PostGIS schemas to find our data in.
- Locate the PostGIS Schemas setting in the Global Configuration section.
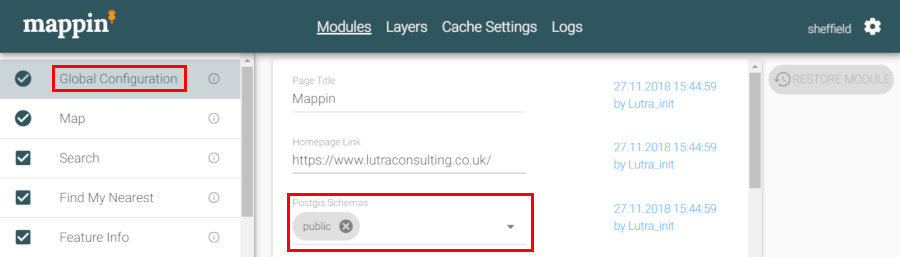
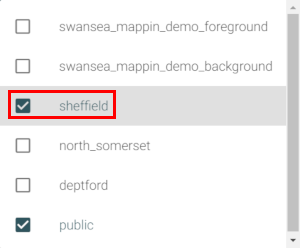
Add the sheffield schema (where our green spaces are located).
It’s recommended that project schemata be listed here prior to using the LOAD LAYERS tool as described in later steps. This will allow Mappin to automatically detect the Name (PostGIS) and Data CRS settings for published layers.
- Click SAVE CHANGES.
Next we’ll tell Mappin which layers from the uploaded QGIS project it should publish.
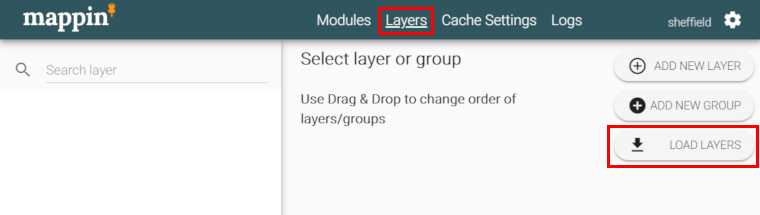
- Select Layers then click the LOAD LAYERS button.
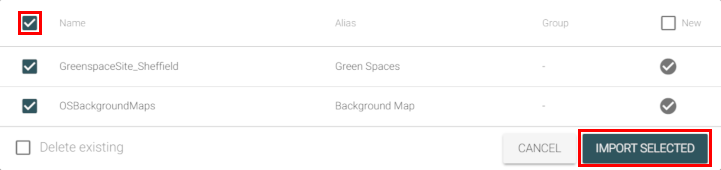
Here we see a list of all the layers in the QGIS project we uploaded.
- Select all the project layers
- Click IMPORT SELECTED
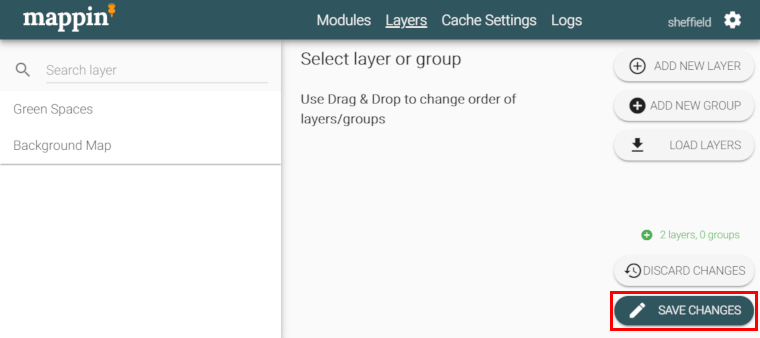
At this stage our configuration changes are still pending (unsaved) which means we can revert them if desired.
- Click SAVE CHANGES
Now Mappin knows which layers to publish we just need to configure the published extent.
- From the Modules section, select the Map module
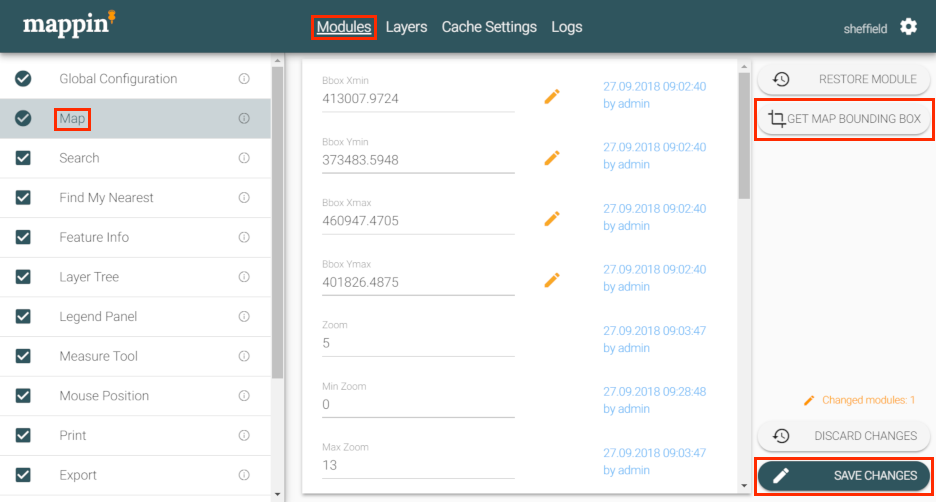
- Next click GET MAP BOUNDING BOX
This will update the four bounding box parameters as shown on the image above. The values are the ones we set earlier (Advertised extent) in the QGIS project file. These bounding box values define an area which Mappin will restrict the project to - the user will not be able to pan outside of this area. The values are also used (the centroid of the bounding box) to define where Mappin will initially centre the map (if initial center is not set up).
- Click SAVE CHANGES
Your first map is now published!
Checking Out Your First Map
Now our first map should be published so let’s go and take a look at it.
- Navigate to
https://YOU.cloudmappin.comwhere YOU is your Mappin account name
Here you’ll see a list of all your public projects (including the Mappin demo project).
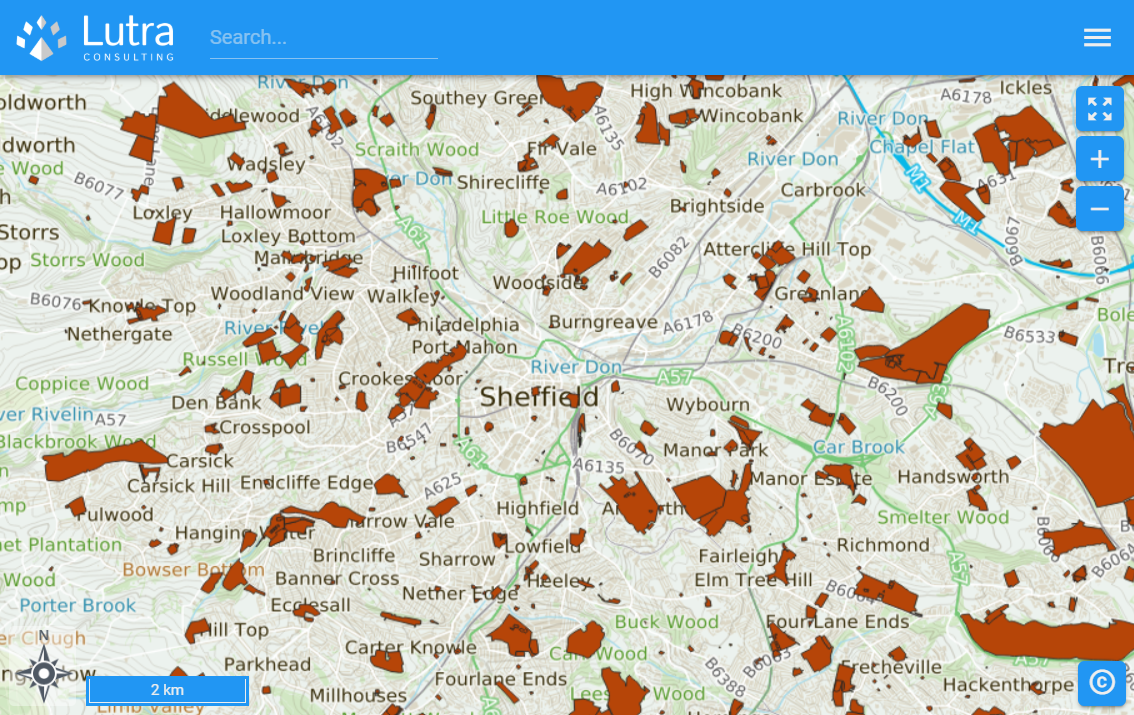
- Select the Sheffield project
And here’s our first map! The colour scheme needs some work but we’ll do that in the next section.
If your background maps look pixelated / poor quality then please refer to the Troubleshooting section.
Before we continue, let’s take a moment to look at how we can point people to our Mappin projects:
https://YOU.cloudmappin.comlists all your public projects and also allows users to log in (more on that later)https://YOU.cloudmappin.com/PROJECTtakes them directly to the project PROJECT, using the default map view
You may have noticed that the URL (web address) shown in the browser changes as you navigate the map. For example, consider the following address:
/sheffield#map?layers=2,1&bg_maps=&zoom=6¢er=436977.72145,387655.04115
The URL contains information on the layers being displayed, any background maps loaded, the map centre and the zoom level. This allows you to copy the URL and share it - viewers will then see the same layers in the same location and zoom level.