Mappin
By now you should have superuser access to a PostgreSQL database server with PostGIS extension installed and also access to a WMS server (QGIS Server or GeoServer).
Mappin comes shipped with its own Python installation. Mappin can co-exist with other Python installations, however, no other Python installations should be included within the PATH environment variable on the server.
Installing Mappin
Run the Mappin installer (e.g.
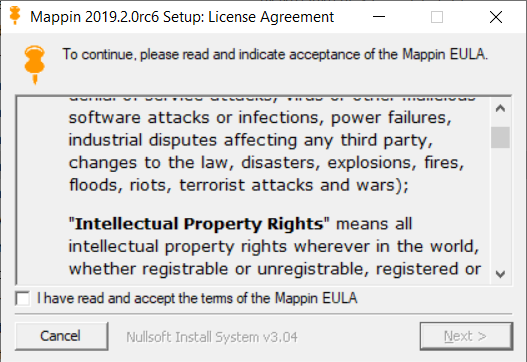
Mappin Installer - 2019.2.0.exe)If you’re happy with the EULA, click Next:
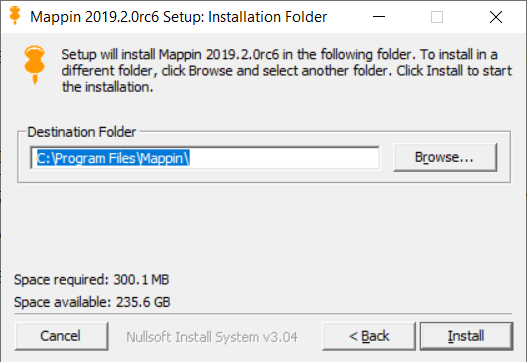
Select a destination folder for Mappin and click Install:
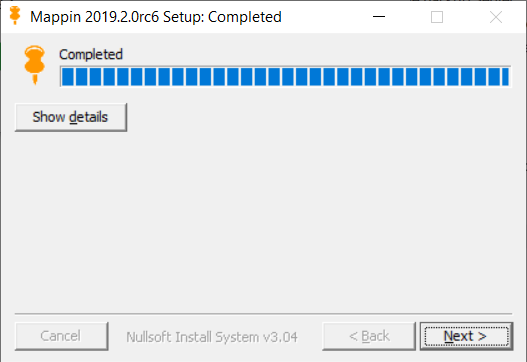
When the installation has finished, click Next:
Enter the hostname, port and postgres password for the database server where Mappin will be storing its configuration information and click Next:
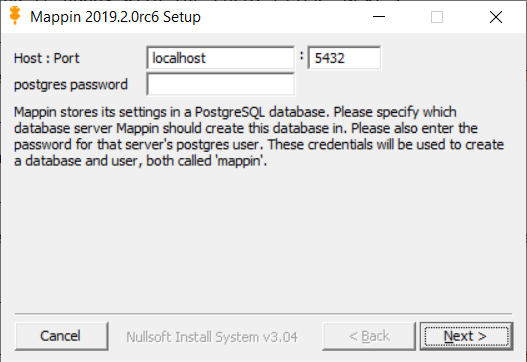
The installer will use the supplied password to connect to this server as the postgres user (database superuser). It will then create a new database called mappin which will be used by Mappin to store its configuration. The installer will also create a new, unprivileged database user (also called mappin) which Mappin will use to connect to the database. The superuser password is not stored anywhere or used by Mappin itself.
Enter the details of the database (and server) from where Mappin will read GIS data and click Next:
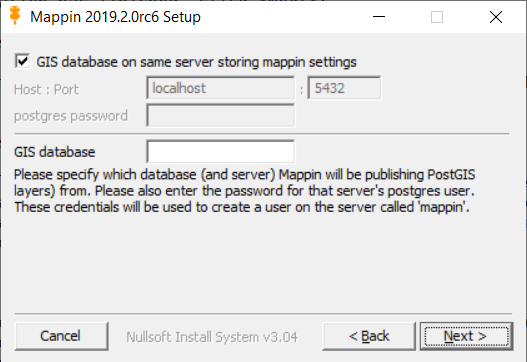
Mappin can publish PostGIS layers stored within a PostgreSQL database. Please enter the name of the database where GIS data should be read from. If the database is on a different server to that hosting Mappin’s configuration database (previous step) then enter these server details too. The installer will create a new, unprivileged user (if not existing) called mappin with which it will connect to the database hosting the GIS data.
Enter the URL of the WMS server you wish to use and click Next:
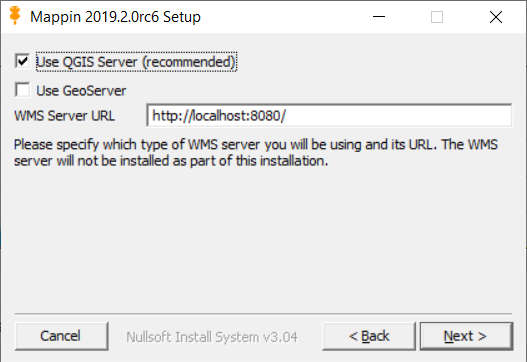
Mappin can make use of either QGIS Server or GeoServer. You need to enter the base URL for the WMS server.
Specify where Mappin should store its cached map tiles and click Next:
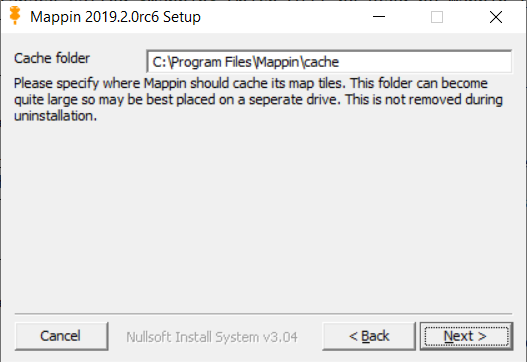
This folder can get quite large so it’s recommended that it be stored on a separate drive to the operating system. Please note the contents of this cached tiles folder are not removed during uninstallation.
Specify where Mappin should store its log files and click Next:
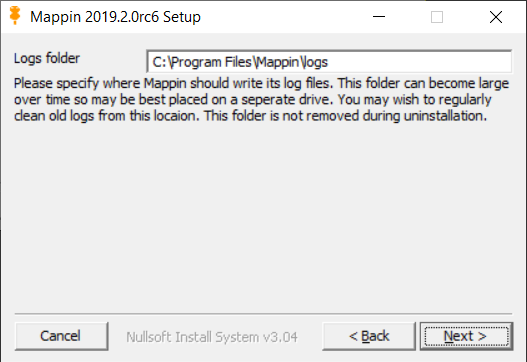
Again, the logs can become quite large so it’s recommended that these be stored on a separate drive to the operating system. The logs are also not removed during uninstallation.
Specify where Mappin should store its project data and click Next:
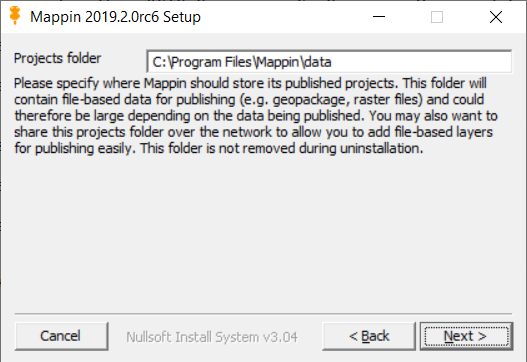
Mappin will create subfolders here for each published project. If using QGIS Server, each project folder will contain the QGIS project file that QGIS Server reads to render WMS images. If your QGIS project refers to file-based data (e.g. Shapefiles, TIF files) then these files should ideally be copied to these project folders and your QGIS project should reference them by relative path names. Depending on the size of your published data, the content of this folder can become quite large so, again, you may want to set this value to a folder on a separate drive to the operating system. The contents of this folder are also not removed during uninstallation.
- Finally, set a password for Mappin’s admin user and click Next:
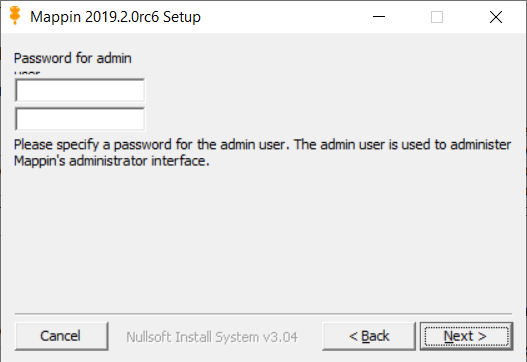
This is the administrative user which has rights to modify published projects.
- Click Next to start the configuration of Mappin:
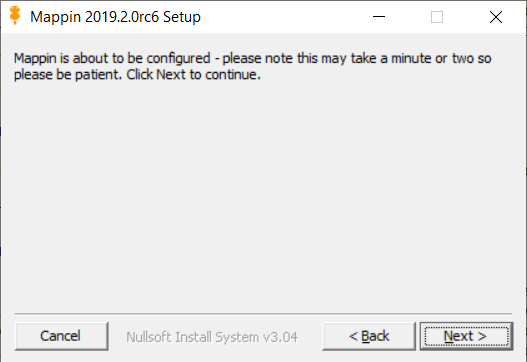
This may take a few moments so be patient.
- Mappin should now be installed, click Close to finish:
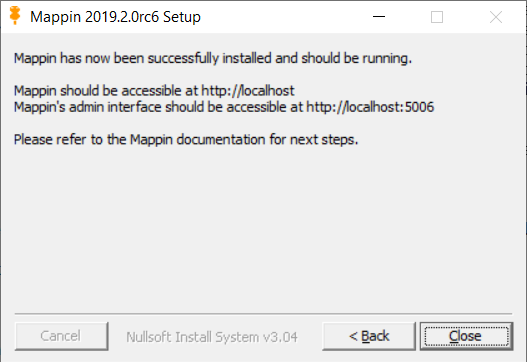
Mappin should now be running on port 80 and the Mappin Administrator’s Interface should be running on port 5006. You can access them with these links from the machine you installed on:
When accessing them from other machines, replace localhost with the hostname of the server on which Mappin was installed.
You can test your installation by opening Mappin and then selecting the test project appropriate to your chosen WMS server.
Disk Space
As discussed above, Mappin’s cached map tiles can consume a significant amount of disk space. It’s therefore recommended to monitor available disk space on the server and take appropriate action when it gets low. Old log files can safely be deleted. At the time of writing, Mappin does not support defining a maximum for disk space allocated to cached tiles. See No Maximum Disk Space Allocation for Cached Tiles for more information.